Today, we are going to clean the HAIOU-64 58mm f2. It would take about 15mins to take the lens apart. This one got some mold inside the lens. First, prepare the tools for the work.
Use expendable cleaning paper to clean mold. Lens cleaning fluid is also needed. You can buy them online or any camera shop near by.
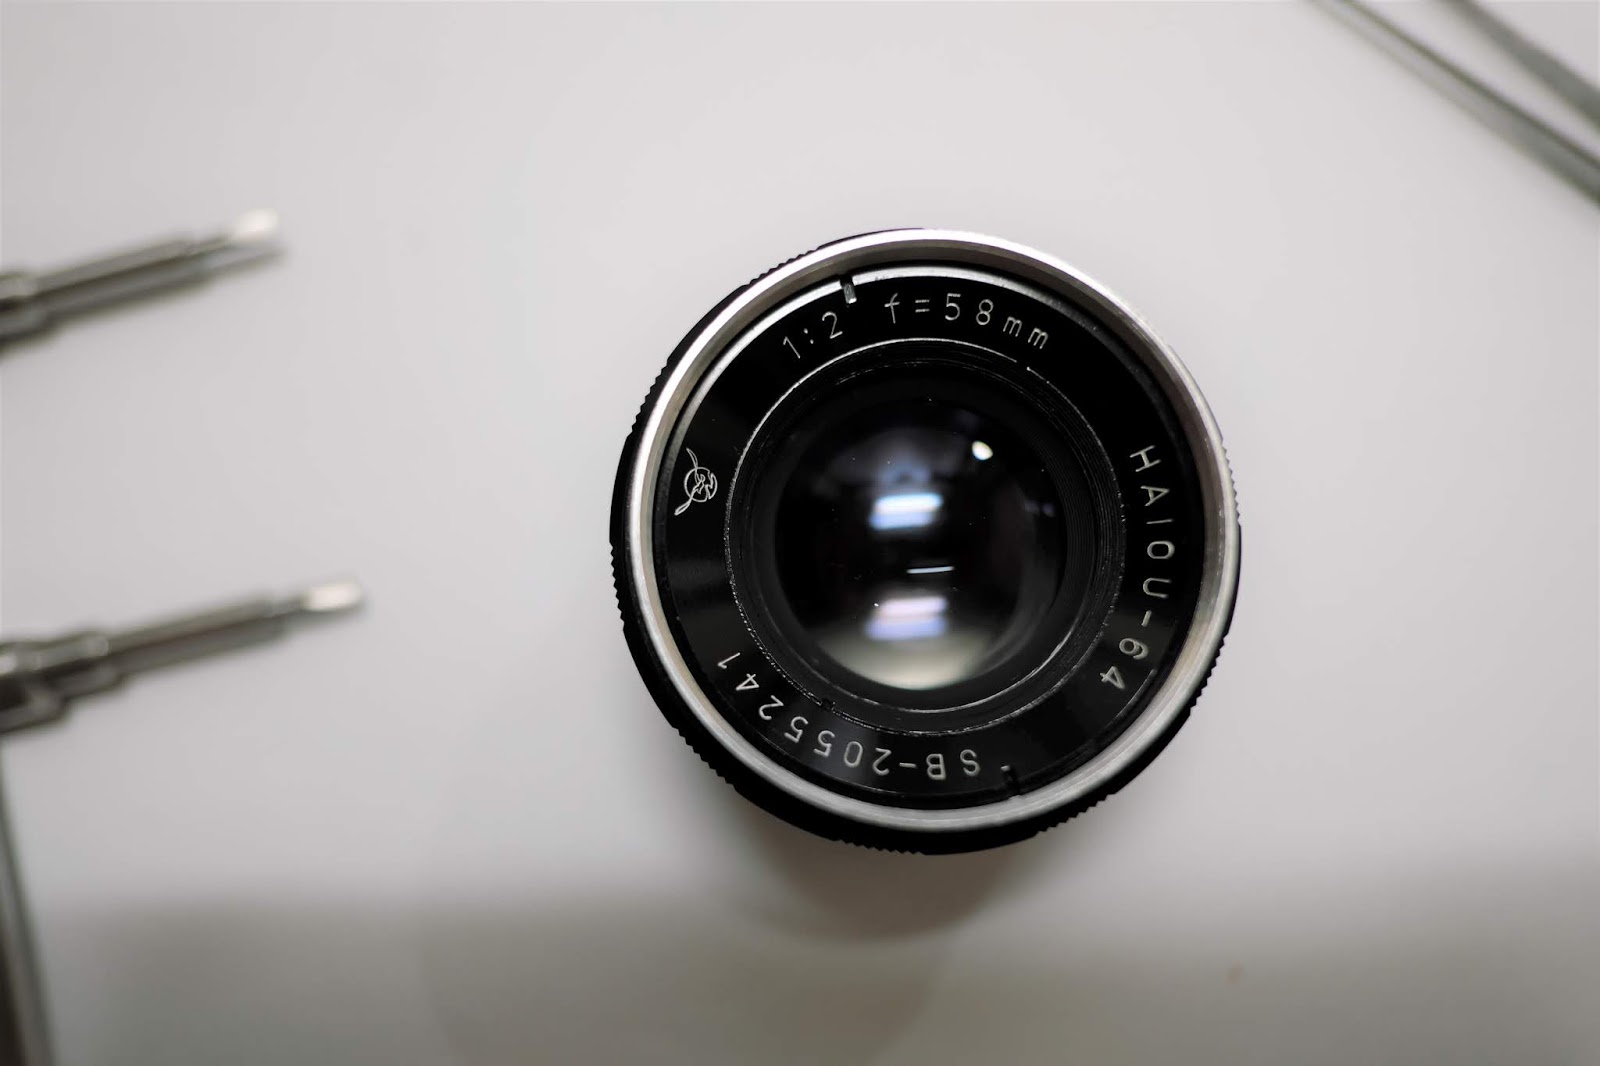
Look at the beautiful lens.
First, screw the top cover off the lens.
It is what it should look like. With the name and numbers on it.
Now, we can look in side the lens.
Take off the inner ring.
The ring is look like this. This ring is for holding the glass beneath.
Now the glass is without any holding. We can pour it out. Pour it on a clean tissue paper instead of your dirty and oily hand!
The lens should look like this.
There is another glass under the top glass. Leave it.
The top glass is different in both side.
The convex side should be on top. Don't make it wrong when you put it back.

Now take off the side 4 screw.
It should look like this now.
These are what we take off from the lens so far. From the left to right in order.
After the 4 screw were out. We can pull the lens holder from the shell.
Now we have two parts. The part with lens and the shell. Leave the shell. We only want to clean the glass.
Beware, there is a C shape metal which control the aperture.
The metal bar on the lens holder should fit in the C shape metal.
The silver hood can take away directly.
The four holes are for the screws.
Now we deal with the lens holder.
Screw the only lens group out.
We can see the aperture with out any glass on it.
There are some mold at the side of the glass.
This is the aperture. Just look at it, it is so beautiful.
 These are what we take off from the lens so far. From the left to right in order.
Now turn the lens holder upside down. We are looking at the bottom glass.
Take out the inner metal ring.
The inner metal ring should look like this.
Pour the bottom glass out. Both side of the glass look quite the same, but they are not!! The little more convex side should face the bottom side. Or just remember which side come out first. Don't make it wrong when you put it back.
These are what we take off from the lens so far. From the left to right in order.
Now use the pointy side.
Take off the metal ring.
The ring look like this.
There is another ring under the previous ring. But this one with no screw, we can take it out directly.
This ring look like this.
These are what we had taken off from the lens so far. The second line, from the left to right in order.
Use the pointy side again. Screw the lens out.
This one is a lens group.
Look like this.
This is the last glass in the lens holder.
When we put it back. We have to adjust the position of the lens holder. Otherwise the aperture may not at the right position. Screw the 4 screw half the way, so the lens holder is a little bit loose. Put a screw driver in the hole, the hole is at the same radius of the screw holds. Adjust the position so the lens is at f2 and the aperture can not be seen.
Put all the parts back, and it is done. This lens is a easy one, hope this article help. I have no responsibility if you screw this up.


 These are what we take off from the lens so far. From the left to right in order.
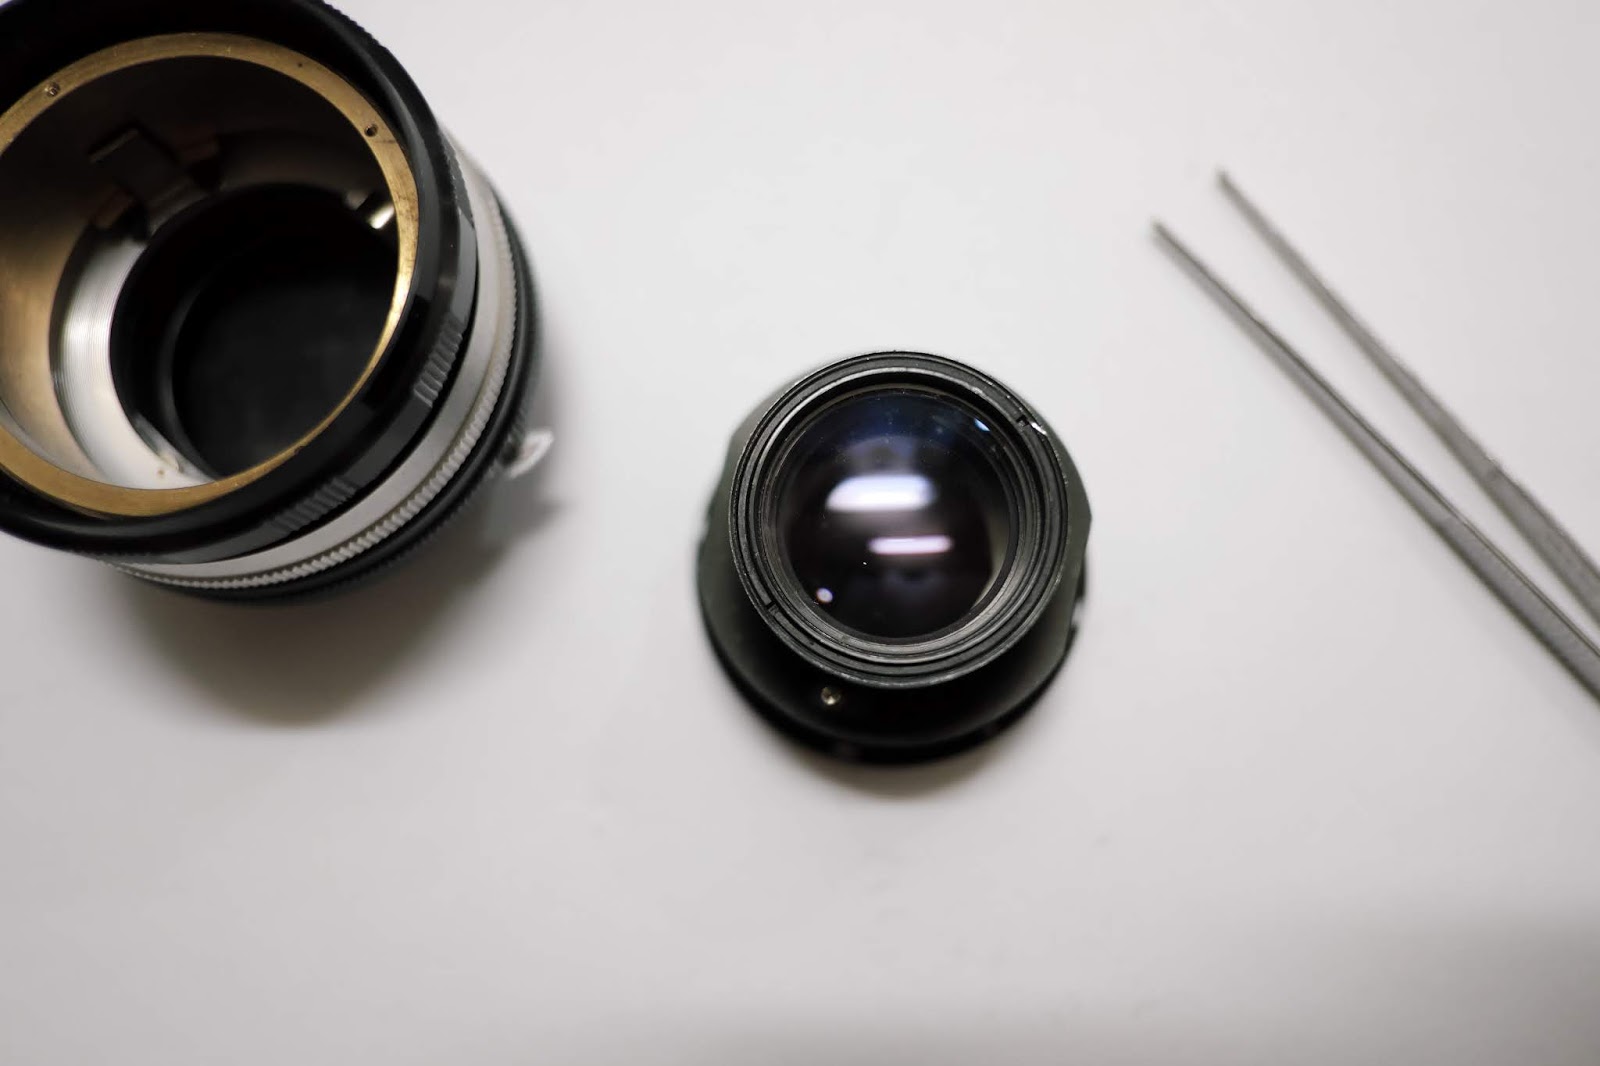


留言
張貼留言